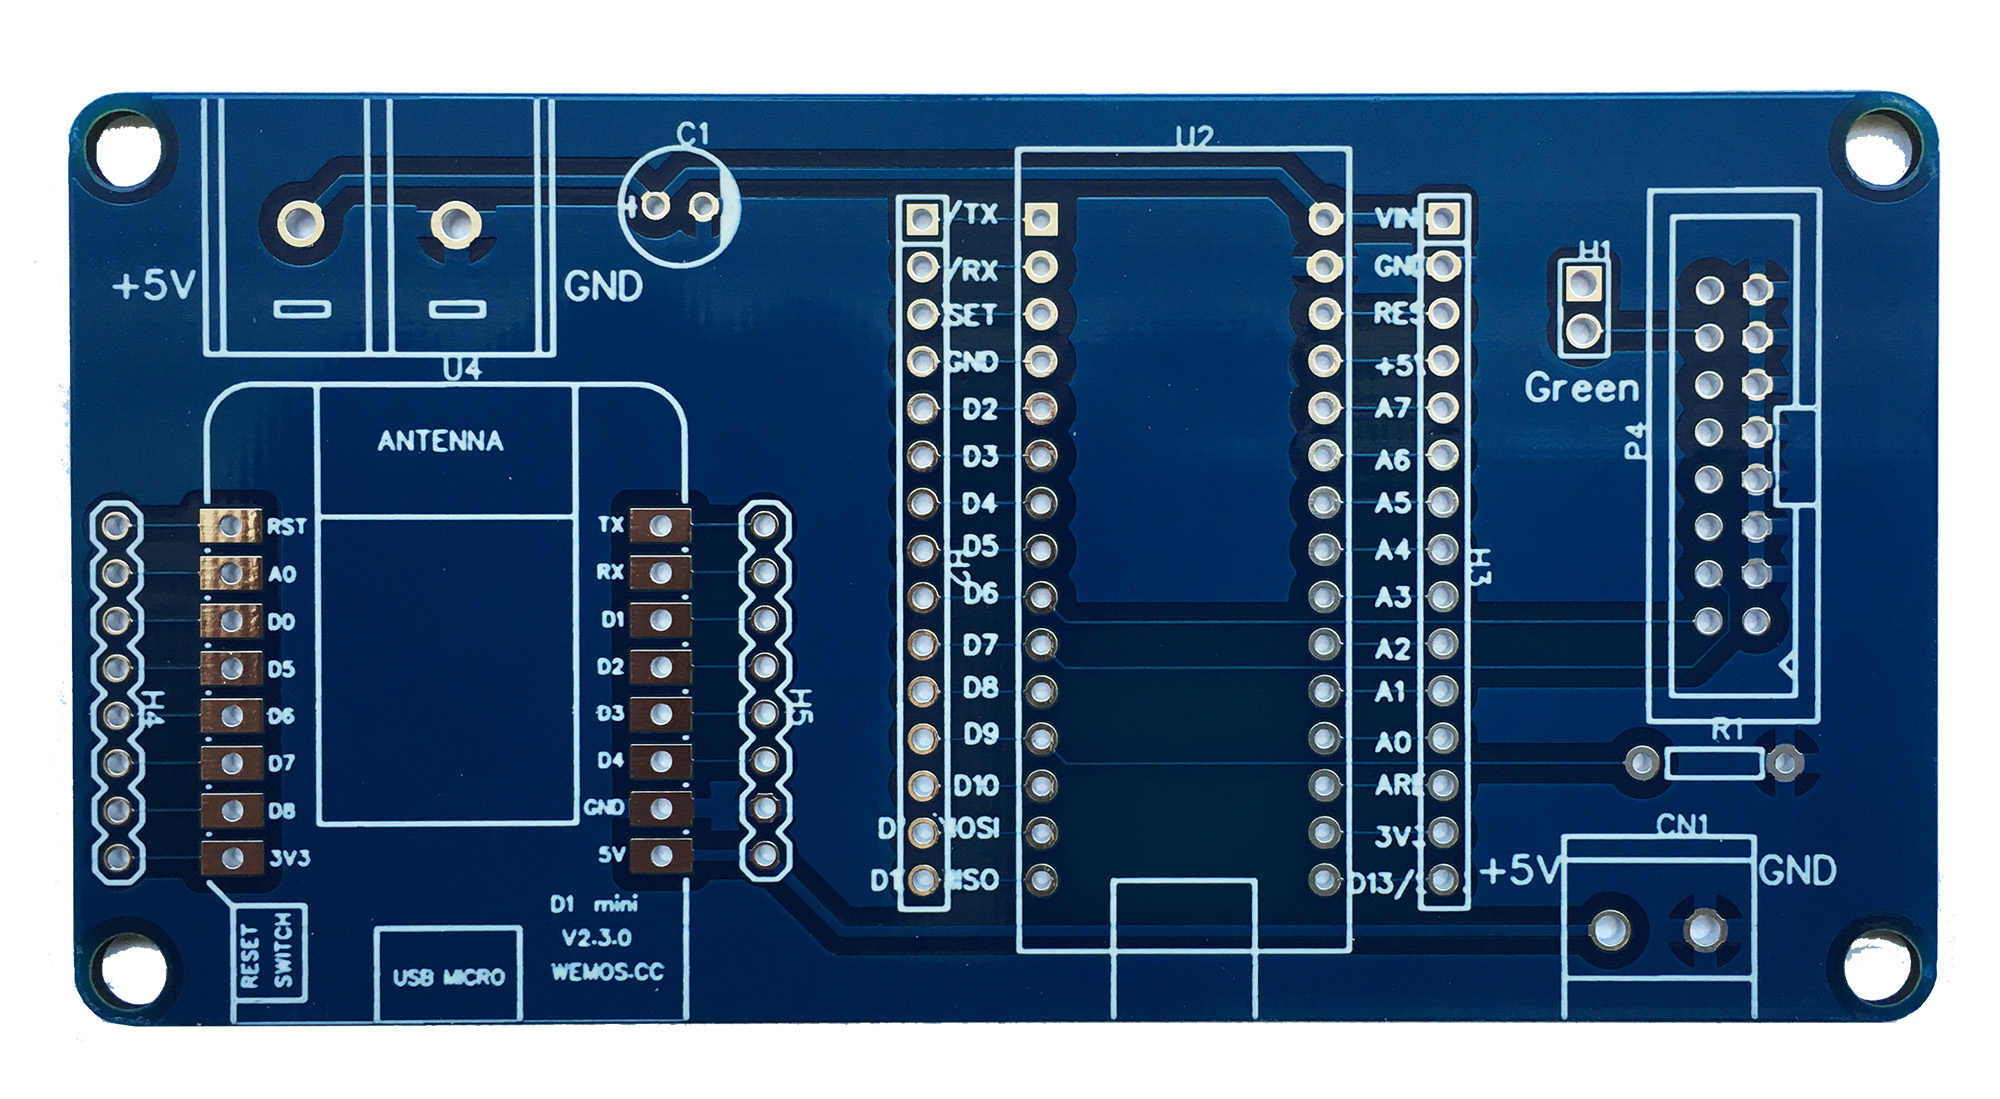
P10 LED ESP8266&Arduino Nano Shield DIY LED Electronics Store
Code WiFi configurable P10 LED Screen arduino 1. Connect to arduino Wifi 2. Use any web explorer to open: 192.168.1.240/arduino 3. Go to Wifi console. 4. Use the command to update the price: "actualizar/10.23" will show a price of $10.23

P10 led panel arduino bopqeaurora
Step 1: Materials You Need You will need: Arduino P10 LED Display Module DMD Connector Ask Question Step 2: Wiring Connection Connect P10 LED Display with arduino according to pin configuration above. Here we use DMD Connector. Step 3: Connection Installation of module like picture above. Step 4: Code

Cara Menampilkan Karakter dari Arduino ke DMD Panel Led Matrik P10
A P10 LED Display Module is the most suitable for designing any size of outdoor or indoor LED display advertisement board. ex: The 32*16 module size means that there are 32 LEDs in each row and 16 LEDs in each column. So there is a total of 512 numbers of LEDs present in each module unit. It can fully control with Arduino microcontroller or similar boards.

Testing P10 RGB LED Panel with Arduino Mega 16x32 led matrix arduino
Interfacing P10 LED Display with Arduino July 10, 2022 Engineeering Projects The P10 LED display is a single color (red, blue, and yellow), high brightness, lower power consumption, and long lifetime display module designed for semi-outdoor use. One display module we are using contains 16×32 = 512 LEDs.

P10 LED Matrix Scrolling Text Display using Arduino Nano Part 1
Day 3: Linderhof Palace, Oberammergau, and Neuschwanstein Castle. Day 4: Lake Drachensee and Ehrwald. Day 5: Aqua Dome Thermal Spa, Innsbruck, and Mayrhofen. Day 6: Olpererhütte Mountain Hut and the Zillertal Alps. Day 7: Lake Achensee. Day 8: Grosser Ahornboden and Engalm Alpine Pasture. Day 9: Mittenwald.

Arduino Countdown Timer using P10 Display Engineering Projects
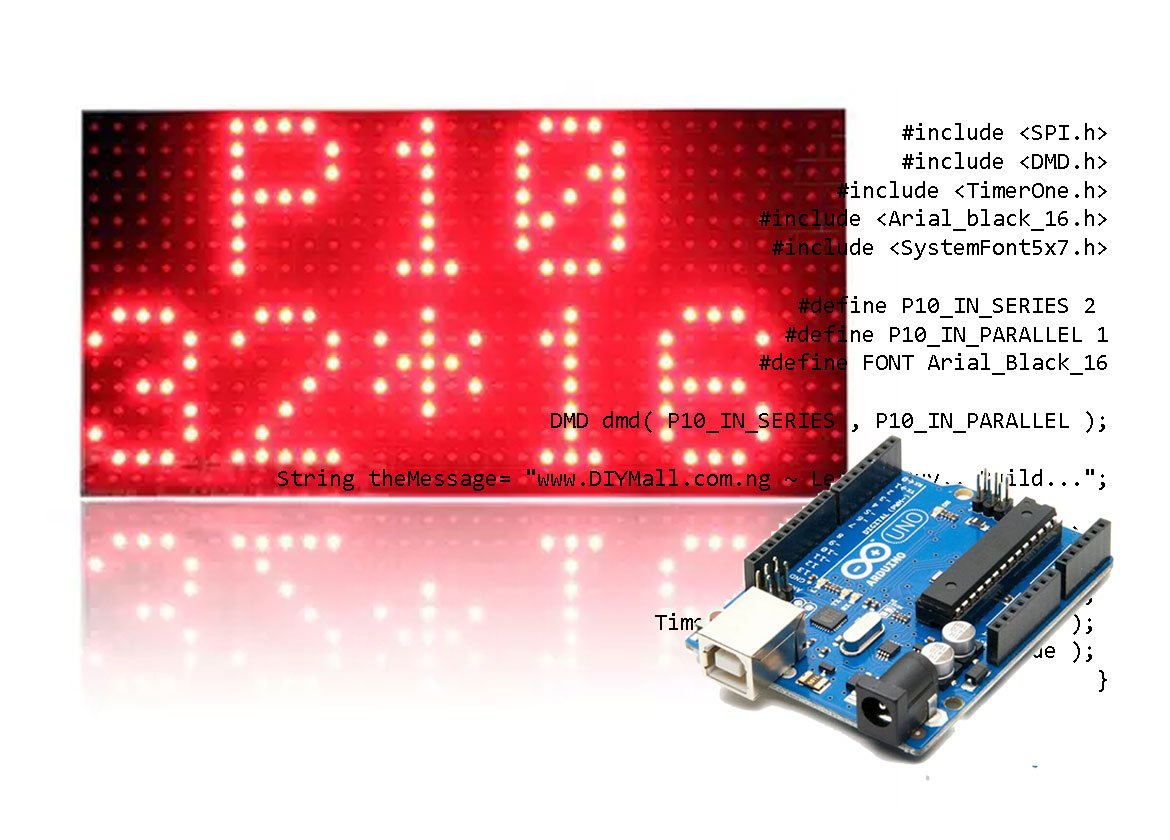
Programming the Arduino for P10 LED Display Board Complete code for this Wireless notice board using Bluetooth module and Arduino is given at the end of the tutorial, here we are explaining the code in detail. First, download and install the DMD.h and TimerOne.h library from the given links and then include all the required libraries in your code.
Electronics Message Display using Arduino Uno and P10 DMD Module DIY
In this tutorial we are going to use a 32x16 LED dot Matrix display module which is also known as P10 LED Display Module to display a scrolling text by using Arduino UNO. P10 modules can be cascaded to build any size of the advertising board. Required Components Arduino UNO-1 32*16 P10 LED display module-1 16 Pin FRC connector-1 5V DC,3 AMP SMPS

ARDUINO JAM DIGITAL DMD LED PANEL P10 YouTube
custom robot servo axes individual engineering prototype series production SERVOneering.

Arduino + P10 LED Display Panel Arduino Uno with P10 LED Display
Arduino Countdown Timer using P10 Display July 30, 2022 Engineeering Projects In this article, we make an Arduino Countdown Timer using P10 Display. The counting is done by Arduino and then displayed in the P10 LED module. This project might come in handy for time-keeping purposes during physical games.

P10 LED Matrix Scrolling Text Display using Arduino Nano Part 1
Description: P10 Led Module Specifications: Operating voltage: 5V. 32 x 16 Red Led. Body: Plastic. IC control On board. Step 2: Connect the LED to Arduino. Description: This is the P10 led module installation scheme for Arduino:

arduino p10 board project। arduino p10 board with dht11।p10 board with
Description http://www.electroons.com/blog/ledp10-arduino-library-for-p10-led-display-panels/ Files LedP10 (1).zip LedP10 Arduino Library Zip Archive - 43.87 kB - 09/22/2017 at 05:08 Download Project Logs Collapse Completed

Scrolling Text display on P10 LED display board using Arduino YouTube
Step 1: P10 Module Features: 32 x 16 high brightness Red LEDs (512 LEDs total) on a 10mm pitch 5V operation Viewable over 12 metres away Tough plastic frame Controller ICs on board, simple clocked data interface Arduino compatible library, graphics functions and example support You can see a two connectors on the P10 modul.

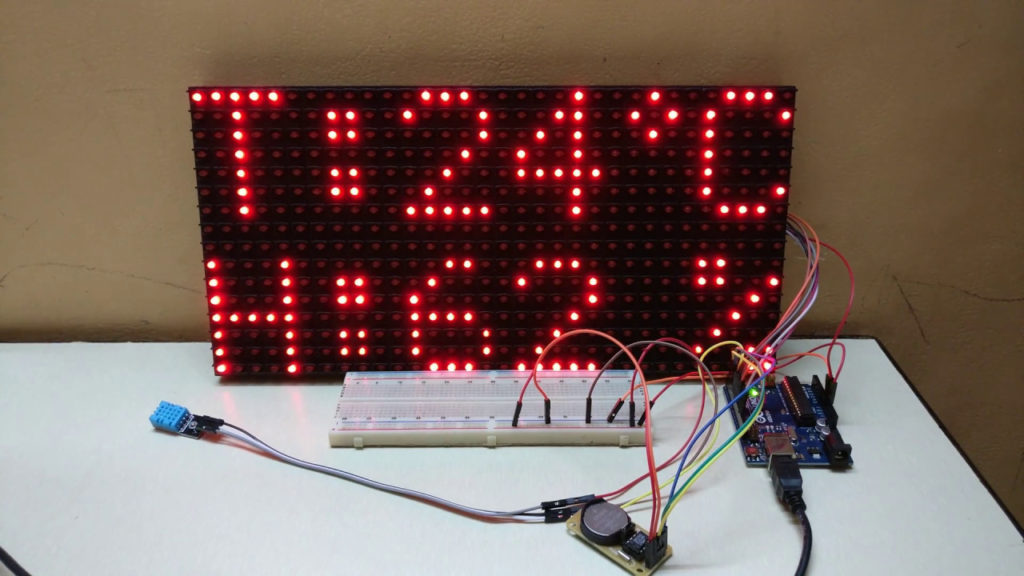
Display Temperature on P10 LED Display Module Using Arduino 3 Steps
Very easy way to use P10 led dot matrix panel display pannel with arduino using DMD library. Here you will learn the connection diagram of 2 panels with ardu.
DMD P10 Panel Interfacing DMD P10 Panel, RTC And DHT11 With Arduino
Step 1: DMD Specification P10 Led Module Specifications: Operating voltage: 5V 32 x 16 Red Led Body: Plastic IC control On board Ask Question Step 2: Connect the LED to Arduino This is the P10 led module installation scheme for Arduino: P10 Led to Arduino OE ==> D9 A ==> D6 GND ==> GND CLK ==> D13 SCLK ==> D8

how to use p10 led text display with arduino । p10 board with arduino
Arduino IDE + ESP32 + P10 | Interfacing P10 LED Display with ESP32 + Set Text on P10 with Web Server.In this project video I use Arduino IDE (V1.8.9), Arduin.

Tutorial Running Text dengan P10 Hestech Indonesia
This video shows how to interface P10 or 32x16 DMD display using Arduino UNO. Using this example you can build big size advertising board and earn.🪔 Please.